Basement Renovation Mistakes That Cost GTA Homeowners Most
A meaningful share of our basement work is redoing someone else's basement. The same five mistakes appear over and over — cheap to avoid, expensive to fix after drywall.
Mistake 1: Finishing a Basement That Still Gets Damp
This is the most expensive mistake on the list, and the most common. A basement that takes on water once a year — a spring seep at the cold joint, a damp corner after a July downpour — gets framed, insulated, and drywalled anyway. Eighteen months later there is mould behind the vapour barrier and swollen baseboards, and the fix means demolishing finishes that were just paid for.
The discipline is simple: water first, walls second. Walk the exterior in hard rain. Fix grading and downspouts. Inject foundation cracks. In flood-prone areas, add a backwater valve and sump before finishing — Toronto's flooding protection subsidy currently helps with those costs. Then let the basement prove itself dry through at least one wet season, or verify with proper moisture testing if you cannot wait.
Our answer on waterproofing before finishing a basement covers the diagnostic sequence in detail. The rule of thumb we give every client: a dollar of drainage work before finishing saves ten dollars of demolition after. No finish material, no matter how premium, survives a wet foundation.
Mistake 2: Skipping Permits and Paying at Resale
The unpermitted basement rarely blows up during construction. It blows up years later — during a sale, an insurance claim, or a complaint.
The legal exposure is real: building without a required permit carries fines up to $50,000 for a first individual offence under the Building Code Act, plus stop-work orders, and Toronto adds a surcharge of 50% of the permit fee when work starts before a permit issues. The practical exposure is worse. Open or missing permits surface in title searches and stall closings. Insurers can use unpermitted wiring or plumbing to fight a claim. And buyers who spot an obviously unpermitted basement discount their offers accordingly.
What actually needs a permit? Almost any real basement project: new bathroom or wet bar plumbing, structural posts and beams, underpinning, a walkout, or a secondary suite. Only purely cosmetic finishing — no plumbing, no structural changes, no new unit — is exempt, and electrical work always needs an ESA notification regardless. Toronto permit fees start at $214.79 as of 2026; a typical package lands between $700 and $3,500. That is cheap against the alternative, which is applying for a retroactive permit and opening finished walls wherever the inspector requires.
Mistake 3: Ceiling Height Wishful Thinking
Measure before you dream. We regularly meet homeowners with detailed plans for a basement that is 6 feet 4 inches under the ducts — plans that no measuring tape has ever touched.
Height problems concentrate in older stock. Pre-1920 Toronto houses — Victorians and Edwardians in Riverdale, Leslieville, Parkdale, and their Hamilton equivalents — commonly have basements in the 6'0" to 6'6" range. Wartime bungalows in East York carry low, shallow basements too. In contrast, post-war bungalows across Etobicoke and Scarborough usually offer full or near-full height, which is exactly why they convert to apartments so readily.
When the height is not there, the honest options are structural: underpinning runs $350-$480 per linear foot in Toronto as of 2026, with typical projects landing $40,000-$90,000 before finishing; bench footing is cheaper at $75-$250 per linear foot but eats floor area around the perimeter. We compare the two in underpinning vs benching. What does not work is pretending: shaving joists, undersized bulkheads, or finishing a space people will never stand comfortably in. Measure the lowest point — under ducts and beams, not between them — before a single design decision.
Mistake 4: Burying Shutoffs and Cleanouts
The main water shutoff. The sanitary cleanout. The gas valve. The electrical panel. The furnace service side. Every one of these needs to be reachable for the life of the house — and every year we open up beautiful drywall because someone sealed one of them behind it.
The worst version is an emergency: a burst supply line upstairs while someone hacks through a finished wall hunting for a shutoff nobody can find. The routine version is quieter but still costs money — a drain-cleaning call that turns into drywall repair because the cleanout is buried, or a furnace replacement quoted higher because the mechanical room was framed too tight to move equipment through.
The fixes cost almost nothing at framing stage. Access panels over every valve and cleanout. A mechanical room sized for equipment replacement, not just equipment operation — furnaces and water heaters do not last forever, and the new one has to physically get in. Clearance in front of the electrical panel. Removable ceiling tiles or access hatches under any junction boxes and shutoffs in the joists. A good contractor maps every service point before framing begins; if your quote does not mention access panels, ask why.
Mistake 5: Cheap Flooring on Cold Concrete
Basement floors fail differently than main-floor ones, because concrete is cold and never perfectly dry. Materials that perform beautifully upstairs fail quietly downstairs.
Solid hardwood is the classic casualty — below-grade humidity swings make it cup and gap, which is why we refuse to install it in basements. Cheap laminate swells at the seams from slab moisture. Carpet laid directly on concrete becomes a cold, musty liability the first time any water appears.
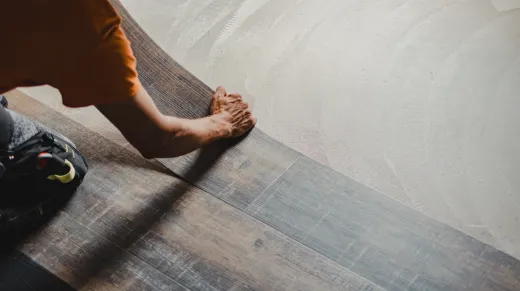
What works, as of 2026: luxury vinyl plank at $4-$9 per square foot installed is the GTA basement default — waterproof, warm-feeling, and tough. Porcelain tile is durable and flood-proof, best paired with in-floor heating if bare feet will use the space. Engineered hardwood can work in verified-dry basements when the look matters. Under any of them, a proper subfloor or underlayment with a moisture barrier breaks the thermal bridge to the slab — the difference between a floor your kids sit on in January and one nobody touches until May. We run through the options in best flooring for a finished basement. Budget honestly here; flooring is the surface you touch every day, and re-doing it means emptying the entire basement.
The Pre-Renovation Checklist That Avoids All Five
Every one of these mistakes is preventable in the planning week. Here is the checklist we run before quoting any basement:
- Water: any history of dampness or flooding? Exterior grading, downspouts, and foundation checked; protection installed and proven before finishing.
- Permits: scope reviewed against permit triggers — plumbing, structure, new unit. Permit and ESA notification budgeted and scheduled, with permit lead time built into the calendar.
- Height: lowest clearance measured under ducts and beams; underpinning or benching priced honestly if the number disappoints.
- Access: every shutoff, cleanout, and panel mapped; access panels and a serviceable mechanical room in the drawings.
- Floors: basement-rated flooring over a subfloor with moisture protection — no solid hardwood below grade.
When does DIY make sense? Painting and finishing touches. When does a contractor earn their fee? Everything on this list, because each item is invisible after drywall and brutally expensive to retrofit. If you are planning a basement anywhere in the GTA, our basement renovation team quotes for free, and our basement renovation cost guide shows what each tier should cost in 2026 — so you can spot a corner being cut before it becomes mistake number six.
Ready to start your renovation?
Our team is here to help you bring your vision to life. Get a free, no-obligation quote today.
Get Free QuoteFrequently Asked Questions
Clear answers to the questions Ontario homeowners ask most.