The real week-by-week schedule for a full GTA basement renovation — including the permit lead time and inspection gates that actually set the pace.
The Honest Timeline: 6-10 Weeks for Full Scope
A full basement renovation — framing, electrical, plumbing for a bathroom, insulation, drywall, flooring, trim — takes 6 to 10 weeks of on-site work for a typical GTA home. A simple open rec room with no bathroom can land at the short end. A basement with a bathroom, a wet bar, or a bedroom pushes toward ten. A legal secondary suite is its own animal and usually runs longer because of fire separation, HVAC work, and extra inspections.
That 6-10 weeks does not include permit time, and this is where most homeowner schedules go wrong. Permit review in Toronto typically adds 4-6 weeks up front for a clean application, so the realistic door-to-door timeline from signing a contract to walking on new flooring is closer to three to four months. Costs for context: basic finishes run $35-$55 per square foot as of 2026, and our basement renovation cost guide covers the full tier breakdown. The rest of this post walks the schedule stage by stage.
Weeks 0-2: Permits, Materials, and Prep
Before a wall gets framed, three clocks are running.
The permit clock. Basement work involving structural changes, new plumbing, or a new unit needs a building permit. Toronto's Express Services stream (formerly FASTRACK) covers basement work including walkouts and underpinning, and clean, zoning-compliant submissions can clear in about five business days. Standard interior-alteration permits with complete drawings more typically take 4-6 weeks, and incomplete files can stretch to 8-14. Fees start at a $214.79 minimum in Toronto at 2026 rates; a typical renovation permit package lands between $700 and $3,500. Our building permits guide covers what triggers a permit and what does not.
The materials clock. Windows, doors, vanities, and specialty fixtures need ordering now so they arrive before the stage that needs them.
The moisture clock. Any dampness gets solved before finishing starts — grading, cracks, drainage. We explain why in our answer on waterproofing before finishing a basement. Skipping this step is the single most expensive shortcut in basement work.
Weeks 2-4: Framing, Electrical, Plumbing, HVAC
Once the permit is issued, the noisy stage begins. Demolition of any old finishes comes first, then framing: exterior wall assemblies, partition walls, bulkheads around ducts and beams. In post-war GTA bungalows this usually takes under a week; older homes with out-of-level slabs and low beams take longer because every wall gets scribed to reality.
Rough-ins follow, and they overlap. The plumber runs drains and supply lines for the bathroom — cutting the slab if there is no existing rough-in — while the electrician wires circuits, pot lights, and smoke alarms. Electrical work in Ontario is regulated by the ESA, not the municipal permit: a licensed electrical contractor files the notification, and fees typically run $90-$300, usually built into the quote. HVAC comes through the same window, extending supply and return ducts so the finished space actually stays warm in a February cold snap.
If a bedroom is in the plan, the egress window goes in now too. A code-compliant opening — at least 0.35 square metres of clear opening with no dimension under 380 mm — typically costs $3,000-$7,000 installed in Toronto, concrete cutting included. See egress window size requirements for the details.
Inspection Gates and Why They Pace the Job
Inspections are the checkpoints the schedule bends around, and a good contractor sequences work so the job never sits idle waiting for one.
For a typical permitted basement, expect a plumbing rough-in and drain test, a framing/structural inspection, and an insulation and vapour barrier inspection before drywall — plus a final at the end. Toronto lets you book inspections online from next business day up to four weeks ahead, and the inspector attends the same day or the next.
Two rules make these gates painless. First, nothing gets covered before its inspection — work that is buried early must be uncovered and re-inspected, which costs days and drywall. Second, book the next inspection before finishing the current stage, so the inspector arrives right as the work wraps. When you hear that a renovation "stalled for weeks," a missed inspection sequence is very often the reason. Each gate typically costs the schedule only a day or two when managed well; mismanaged, each one can cost a week.
Weeks 4-7: Insulation, Drywall, and the Dust Peak
With rough-ins signed off, the space closes in fast. Insulation and vapour barrier go into the exterior walls, get inspected, and then drywall starts — hanging first, then taping and mudding. Installed drywall runs $3.00-$4.50 per square foot in the GTA for a standard Level 4 finish as of 2026. Budget three coats of compound with drying time between each; in a humid Toronto July, compound dries slower and this stage can stretch a few extra days, which is normal and not a red flag.
This is also the dust peak of the entire project. Sanding day sends fine gypsum dust looking for every gap, so sealed doorways, floor protection on the stairs, and a clean daily site matter more this week than any other. If your furnace is running, the return ducts in the work zone should be masked.
Priming happens right after sanding, because primed walls reveal defects that bare compound hides. Tile work in the bathroom — waterproofing, then wall and floor tile — typically runs in parallel during this window so the wet room is ready when finishing starts.
Weeks 7-10: Floors, Trim, Paint, and Punch List
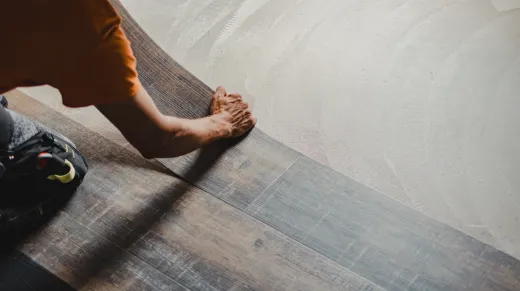
The final stretch runs in a strict order: flooring, then trim, then paint, then fixtures. Vinyl plank — the workhorse of GTA basements at $4-$9 per square foot installed — goes down over the prepared slab. Baseboards and door casings follow, then final paint, then the finish trades circle back: the electrician installs fixtures and cover plates, the plumber sets the toilet and vanity, doors get hung and adjusted.
Then comes the punch list — the walkthrough where you and your contractor list every paint touch-up, sticky door, and missing transition strip. A disciplined punch list takes two or three days to clear. The last gate is the final inspection, which formally closes the permit; an open permit surfaces in future title searches, so do not let this step slide after the furniture goes down.
When does the timeline stretch beyond ten weeks? Legal suites, underpinning, walkouts, and mid-project scope changes. When can it beat six? Small, dry, bathroom-free rec rooms with materials on hand. If you want a scheduled, scoped plan for your own basement, our basement renovation team quotes for free and builds the permit lead time into the calendar from day one.
Ready to start your renovation?
Our team is here to help you bring your vision to life. Get a free, no-obligation quote today.
Get Free QuoteFrequently Asked Questions
Clear answers to the questions Ontario homeowners ask most.